Transitions are an essential element in video editing, as they help to create a smooth flow between different scenes or shots. Without proper transitions, a video can feel jarring and disjointed, which can significantly impact the overall viewing experience.
Fortunately, with advancements in technology and software, creating perfect transitions to splice video fragments has become more accessible than ever before. In this guide, we will explore how to merge videos with style and achieve seamless transitions that enhance the quality of your videos.
What Are Video Transitions?
Before we dive into the technical aspects of how to stitch different videos together, it’s essential to understand what exactly a transition is and why it matters. In simple terms, a transition is a visual effect that is used to move from one scene or shot to another. It helps create a smooth and logical flow between two different elements in a video.
There are various types of transitions that you can use, such as cuts, fades, wipes, and dissolves. Each type serves a specific purpose and can be used to convey different emotions or messages. A quick cut may create an intense feeling, while a gentle fade may evoke a sense of nostalgia.
While creating explainer videos, video presentations, or professional content for personal vlogs, transitions add a professional touch and keep viewers engaged. Additionally, they can also help with pacing and maintaining a consistent flow throughout the video.
How to Combine Videos?
Step 1. Choose a video editor
Whether you are a beginner or an experienced user, choosing the right software to combine videos and perform other editing options is important. There are many options available in the market, both free and paid, so make sure to do some research and choose one that suits your needs and budget.
Some options provide a more user-friendly interface, while others offer advanced features for professional editing. It’s important to consider your skill level and the complexity of the project you are working on.
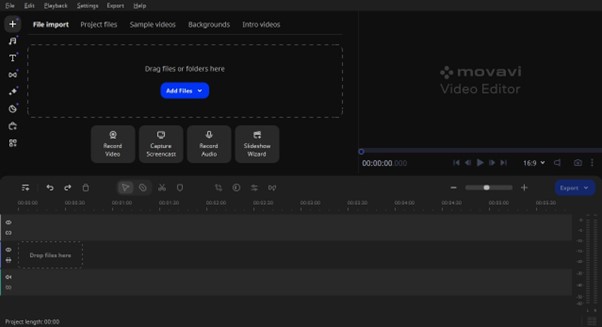
Step 2. Import your videos
Once you have the video editor, the next step is to import the videos you want to combine. Create a new project and click ‘Add Files’ or ‘Import’ to add your videos. Most software allows you to drag and drop files directly into the media bin or timeline.
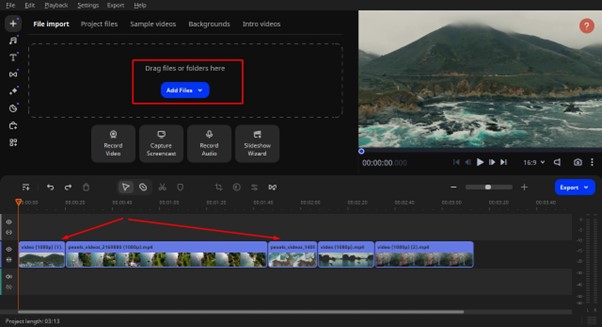
Step 3. Arrange the videos on the timeline
Now arrange everything in the order you want it to appear. To do this, simply drag the clips to a different position on the timeline. Many video editors have unlimited tracks, so you can add multiple videos, images, and audio files, create layers, and adjust the timing of each element precisely. This gives you more creative control over your final product.
Step 4. Add transitions
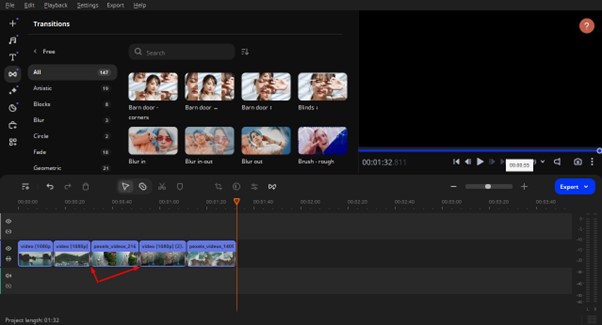
To make one video flow smoothly into the next, you can add transitions between each clip. Go to the ‘Transitions’ tab or search for ‘Effects’ in the software and browse through what’s available. Depending on the software, you can choose from various options such as wipes, dissolves, fades, and more. Apply the transition by dragging and dropping it to the start or end point of a clip.
Step 5. Customize your videos
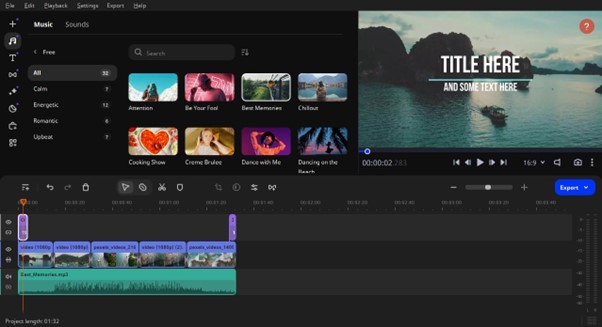
This step is optional, but can add a professional touch to your video. If you want to go beyond simple cutting and merging, you can add some more advanced edits like adding and adjusting music, applying color correction, removing background, adding text, and more. This is where the software’s capabilities and your creativity come into play!
Step 6. Preview and export
Before exporting your final video, make sure all the elements are in place and that everything runs smoothly. Preview your project by playing it back in the software. If you are satisfied with the result, click the ‘Export’ or ‘Render’ option. Select the file format, resolution, and quality you want and wait for the software to process the video.
Video Editing Tips for Great Results
1. Organize your footage
Before you start editing your video, it is essential to organize your footage properly. This will save you time and make the editing process more efficient.
- Start by creating separate folders for different types of footage (e.g., interviews, b-roll shots).
- Use descriptive file names that will help you easily identify the content of each clip.
- Use a consistent naming system for your files, such as scene numbers or dates.
2. Plan your story
A well-crafted video tells a story and takes the viewer on a journey. One of the YouTuber mistakes is not having a clear idea of what story you want to tell through your video. This will help guide your editing decisions and ensure a cohesive and engaging final product.
- Create a shot list or storyboard to map out the sequence of shots you want to include in your video.
- Consider the pace, tone, and emotion you want to convey in each scene.
- Keep your target audience in mind when planning your story.
3. Use music and sound effects
Adding background music and sound effects can enhance the overall impact of your video. They can help set the tone, evoke emotions, and make certain scenes more dynamic.
- Choose music that complements the mood and style of your video.
- Use sound effects sparingly and purposefully to avoid overwhelming your audience.
- Make sure to use royalty-free or properly licensed music and sound effects to avoid copyright issues.
4. Keep it simple
Less is often more when it comes to video editing. It is tempting to use all the fancy effects and techniques available, but sometimes a simple approach can have a more significant impact on your audience.
- Avoid overusing effects such as slow motion or text animations.
- Make sure every edit has a purpose and contributes to your overall story.
- Use cuts and jump cuts intentionally to keep the viewer engaged.
5. Get feedback
Getting feedback from others helps elevate your video editing skills. Show your work to friends, colleagues, or other professionals and ask for their honest opinions.
- Listen to constructive criticism and use it to improve your editing.
- Consider joining a community or online forum of fellow video editors to share knowledge and receive feedback.
- Keep an open mind and be willing to learn and improve your skills.
Conclusion
To merge videos is not just join or connect two videos together. It is about creating a seamless story that flows smoothly from one clip to another, while maintaining the overall quality and consistency.
While the process may seem daunting at first, with the right tools and techniques, anyone can learn how to merge videos effectively. Whether you are creating a personal video for family and friends, or a professional project for work or school, the mentioned steps can help you achieve the desired results.
